I fell in love with the image of this coat pattern. Marcy's colour combinations and fabric choices are always amazing. V8934I had some green and black nylon for the coat shell, but I needed something edgy for the patches.

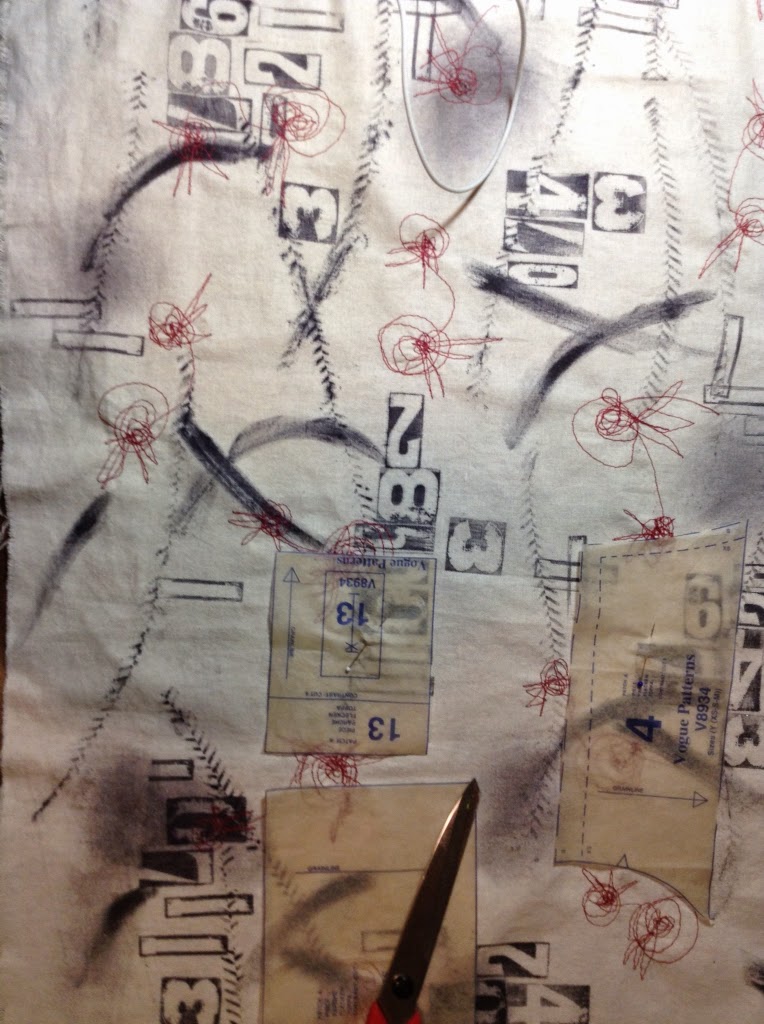
Here's how I'm working this out. I started with a washed linen /cotton blend base fabric - then playing with ink and stamps and mark making stuff, I set to work experimenting.

A brush, numbers stamp set, and a toy tractor wheel with some Ranger archival ink ought to do it. It needed some colour so I did some free motion stitching with red thread.

I probably should have waited 24 hour for the ink to dry and then heat set it with a hot iron....but no... I just proceeded to work with wet ink...

And made a mess of my hands and sewing machine.... Oh - it comes off... Eventually!!!

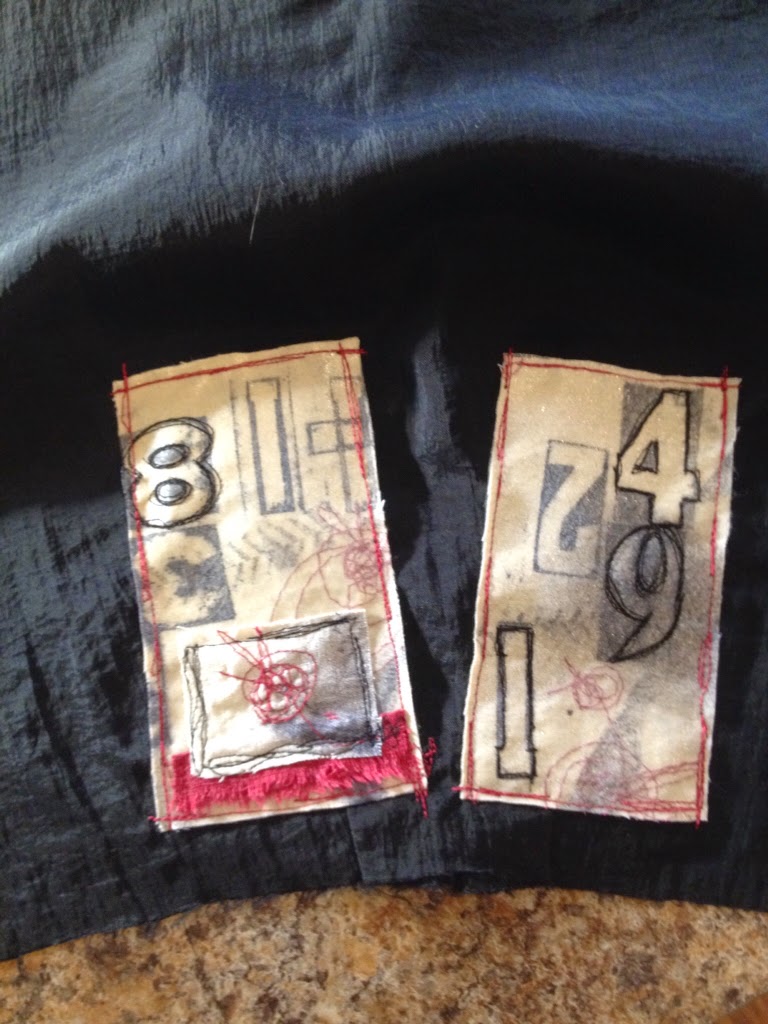
I wound up with this. After I cut out my patches , I thought they were too natural and organic looking next to the nylon.

So I used some Misty Fuse and organza

To layer on top and change the texture and add sheen. This organza can take very high heat.

Then after doing this to 20 some odd pieces I re worked them again with free motion stitching around some of the numbers and/or layering more bits and pieces to them. I could have stayed here for weeks , just playing with this process, but I'm going to need a coat for spring!

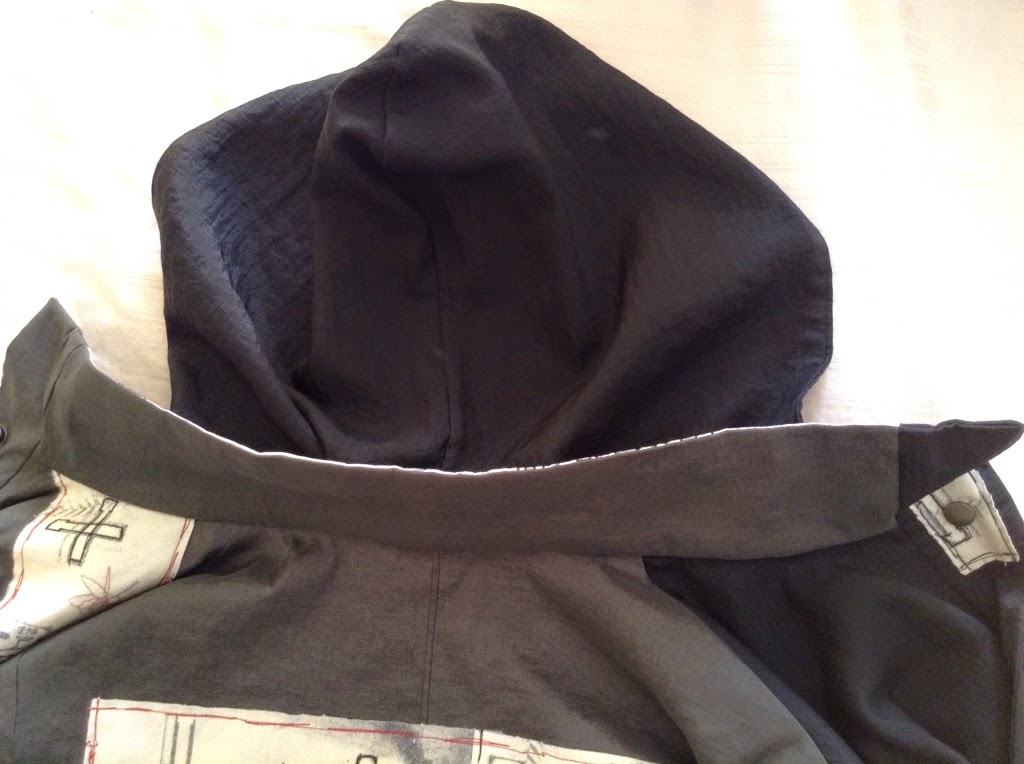
On Marcy's coat the patches were overlocked on all sides. I opted to free motion stitch/appliqué them onto the garment and leave the edges deconstructed. They might fray a bit which is great, but with the Misty Fuse and organza the raw edges should stay put.

There is still time to re work the patches if nessasary before I put the lining in. The lining I'm using is a microfiber twill with horizontal stretch. I picked this up at Value Village and considered making the coat out of it but some how it's a bit dated yet still perfect for a warm lining without too much weight. Making the lining has been a challange because I've been mixing the two views together. I didn't have enough of the lining so I had to piece the back section. No one will know the diff, but it was a pain. The lining is heavier then the nylon coat, with stretch, which created a few issues at the hem facing, as the the coat is bottom heavy already. I've had to hand stitch the hem. If I were to make it again- and I won't -I would just make my lining by copying the coat pattern and bagging it. I also should have shortened it before I started but I am lazy and there were a million pieces.
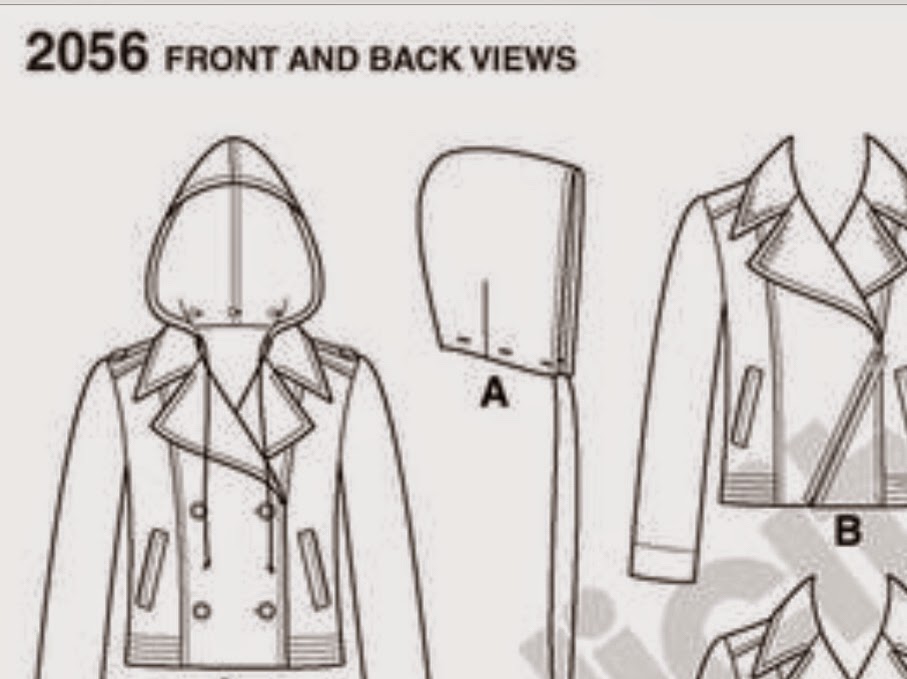
I'm contemplating making a detachable hood for it in the black nylon,I don't think this pattern is in print any longer but that is the hood idea I will use.Because what's the point of a rain coat in B.C. without a hood?!
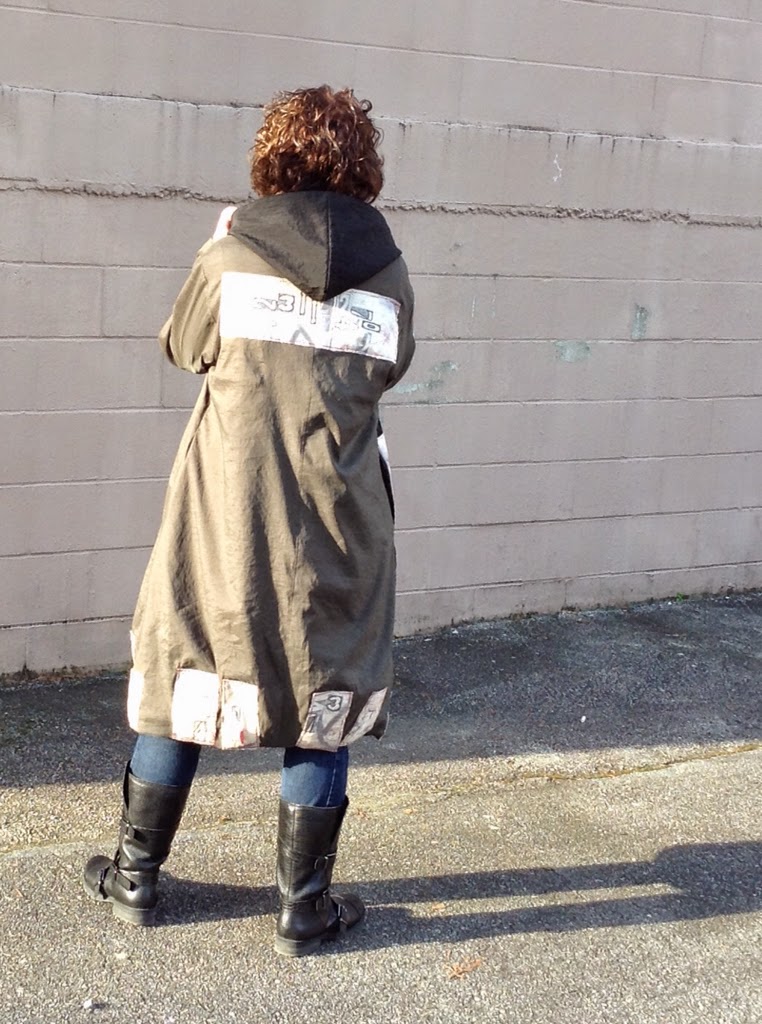
Here is My progress so far. The back view.
Side view.

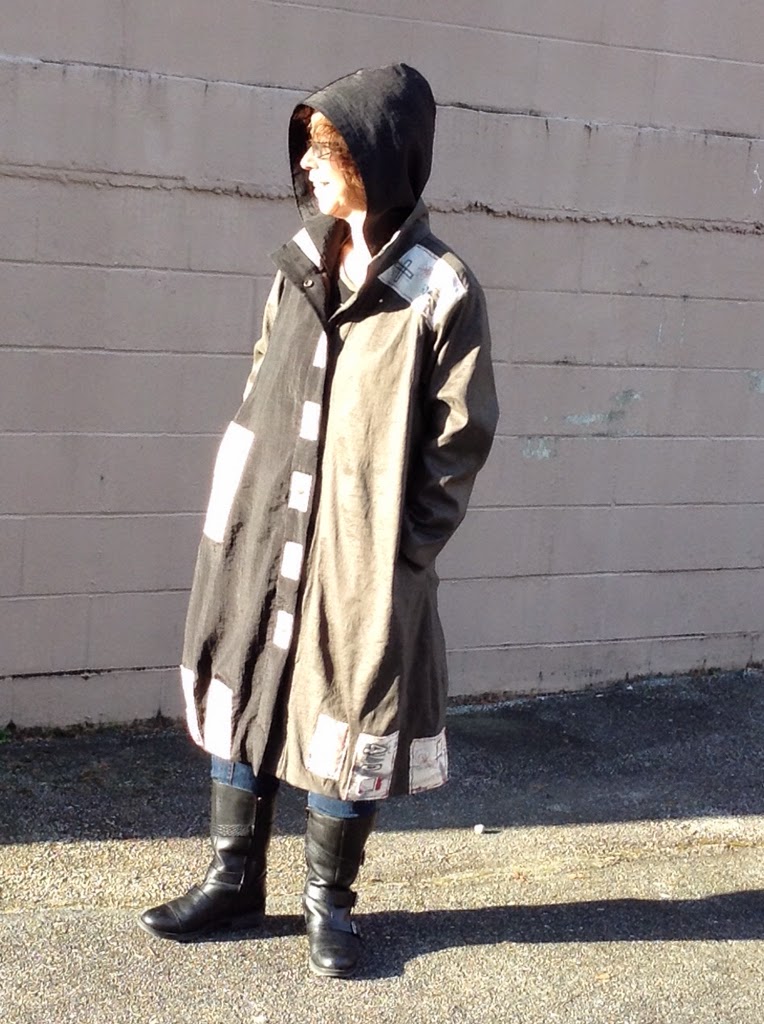
Front view. Making my patches was the fun part. I have picked out black mismatched vintage buttons, which I have pinned on for perspective. Now I'm thinking it looks a lot clownish. Snaps in a smaller scale, will be a better option I think. Or smaller buttons perhaps???? Because I really wanted to have a red buttonhole or two! Or maybe cream colored buttons?

Well I'm not going to lie. This coat has been a difficult sew for me. Not that there is anything wrong with the pattern. I think my fabric choices- mixing woven and stretch. And I think I didn't pick the right lining view to cut. However I'm taking it slow and doing lots of hand stitching in order to ease and fit it altogether. I know it will work out in the end. My hand stitching is good,almost invisible. A few other things that I could have done differently- the patches are a bit too high contrast- hence the clown look. (I just like that word - hence! ) And I could have varied the sizes of the patches more. This is going to be one of those garments people will either love or hate. Fortunately for me, I will love how funky and a little weird (possibly clownish) it will be!

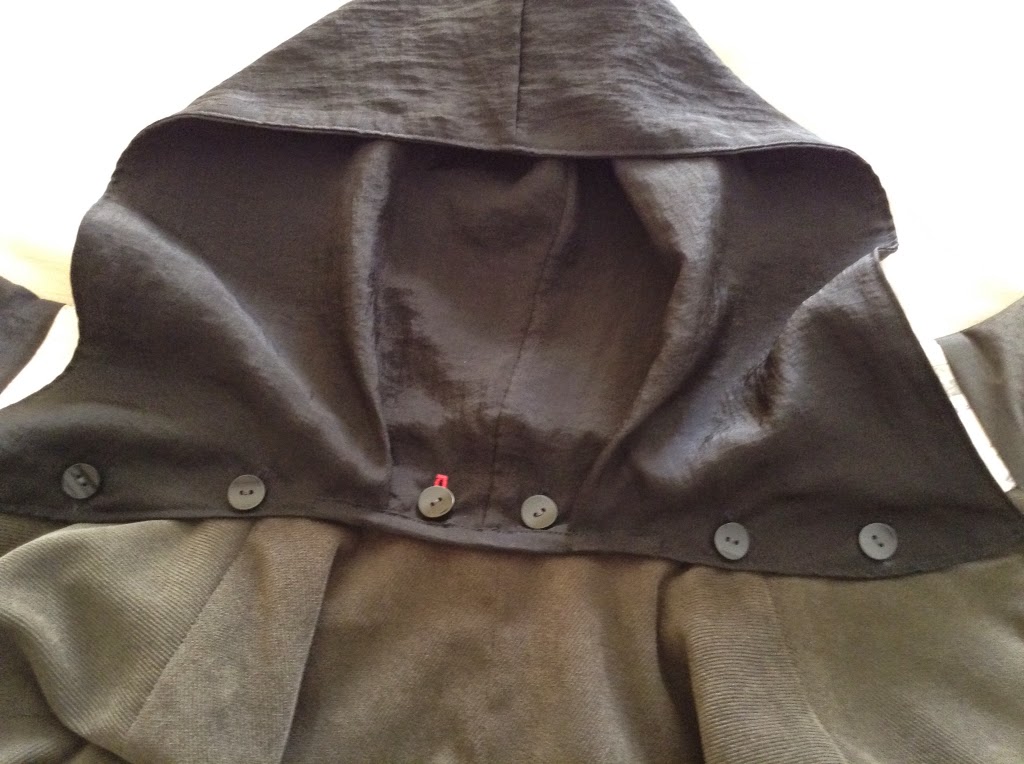
My coat stayed in this position , for days until I finally decided to use snaps instead of buttons. I still wanted to preview what snaps would look like and pinning them on was not really possible without presenting problems. So I came up with a little magic trick! I positioned them on with glue dots!!!! Glue dots that I use for my card making projects.
They stayed in place for another two days and I had to practically pry them off! I have never seen glue dots used this way before. Maybe some have. Whatever the case I will definitely be using this little technique again!!!
And my new best friend is..... This little tool !! A snap setting tool by Prym.

Weighing in at a hefty 41.50$ I have hesitated to buy one of these things for years. What an IDIOT I have been or just really cheap! When I think of all the other crap I've wasted my money on over the years......... This baby works a treat- with just a squeeze! No more yarding my project out to the garage, hammering on the cement floor and making sacrifices to the sewing gods,praying that I won't reck my garment in the final stages. Or ripping out button holes- blek! I want to snap everything. Now what to do with all my buttons?
Next up on my coat adventure- hand stitching. I hand stitched the collar the front facings and the hems. I like hand stitching and sometimes find its the only way I can make things work for me. None of these fabrics liked the heat of the iron, so finger pressing, basting and hand stitching got me through some of the tricky parts. But not without the help of this amazing thread.
It's called Invisafil. It's a very fine, 100 weight poly thread that comes in a large colour range. It's made by
Wonderfil. A Canadian company. Yeah Canada!!! Check out the link. The site has lots of videos and goodies to marvel at. I have a huge assortment of the decorative threads- luv, luv them. My point is; this thread makes your stitches invisible, whereas some threads are just big and chunky and makes everything look home made instead of hand made.
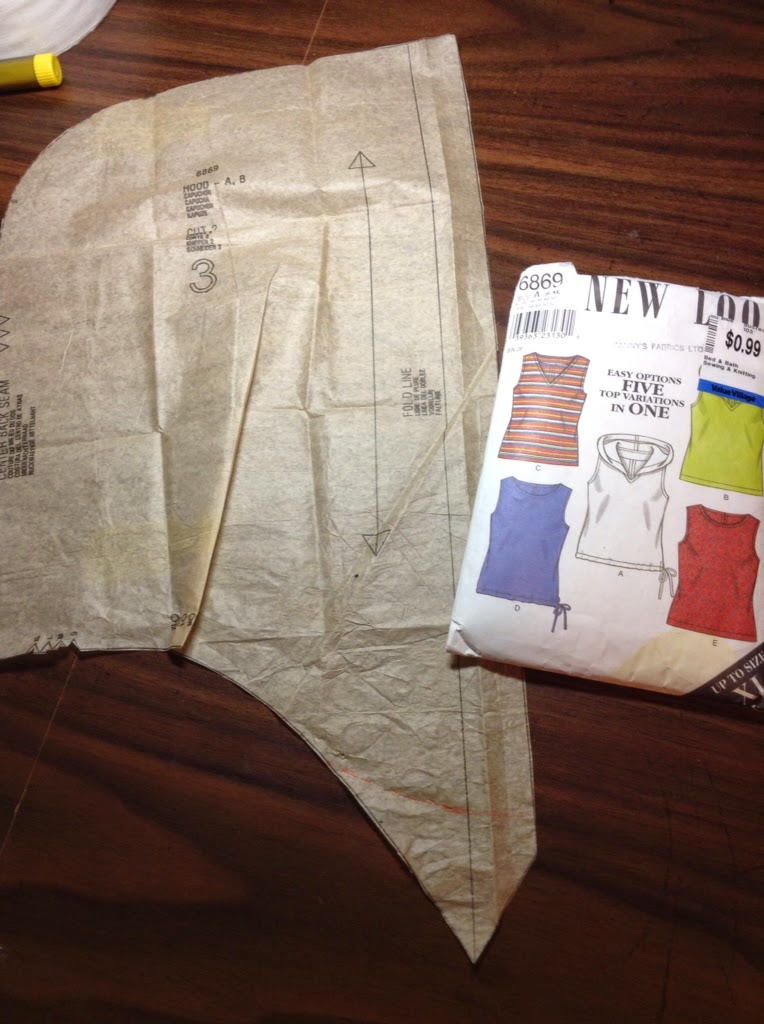
Now I need to start on my detachable hood. And I think this is where I will get to make some red buttonholes. Yippee!
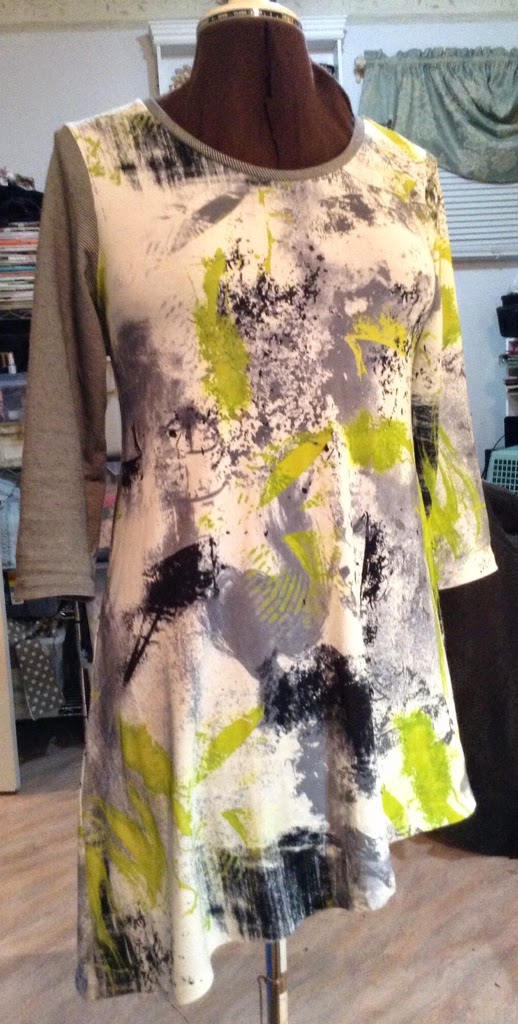
My starting point is an OOP NEWLOOK hoodie pattern. I bought this from Value Village last year for 99 cents and I have already made a dress and tunic from this little gem. I will be attempting to frankenpattern it to fit my coat. So far I have tissue fit it around the collar, removed some excess ease by folding out a dart, re shaped the edge to line up with its new home and added a1" hem. Now let me tell you here and now, I am not a designer or pattern drafter. So please bare with me as I use all the wrong vocabulary, break all the rules and generally fudge this thing together.
To be continued....
Thanks for stopping by.


 I made a detachable hood for it as part of my Make A Garment A Month challenge - to Frankenpattern two pattens together.